Creative Effects Challenge No. 9 – Surreal animal portrait
Aug 29, 2015 16:12:37 GMT
estherf and verber10 like this
Post by Deleted on Aug 29, 2015 16:12:37 GMT
Thanks Tom for the last challenge – some great creations.
This week I was inspired by a tutorial in the Digital Photo magazine, which hails from the UK and I am lucky enough to be able to purchase here in Canada.
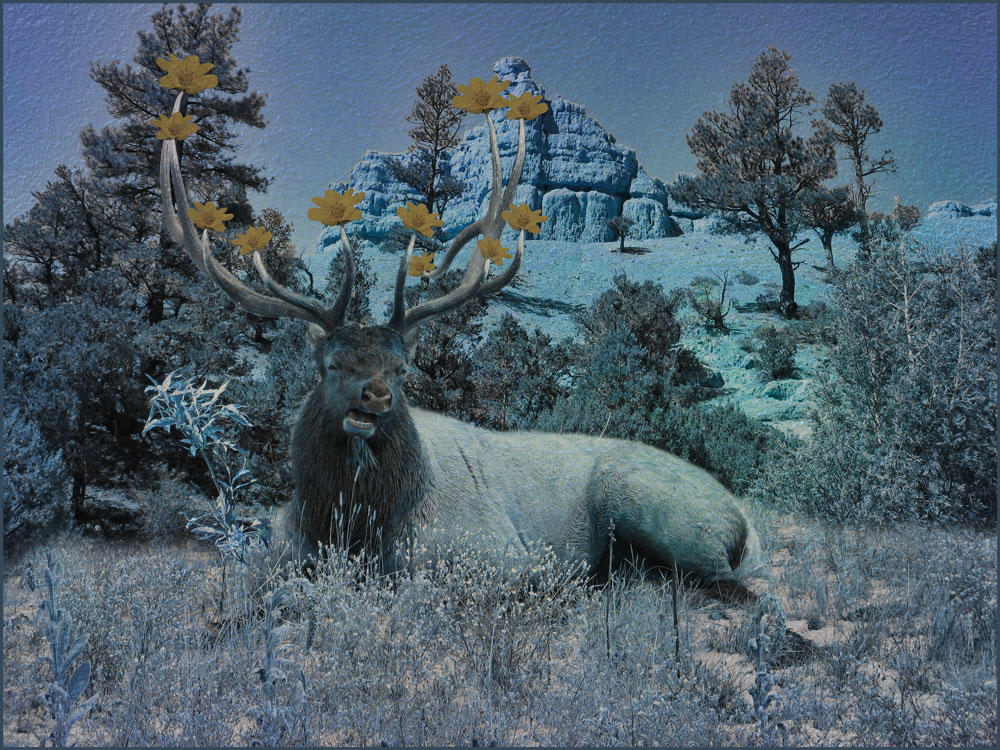
I changed some of the steps to suit my original photograph. The tree photo png file came with the magazine, so I won't be uploading it here and the elk photo is my own.
So, here is my starter images:

And here is the final creation.

Step 1
Open your main image in PSE and then open your tree image (or other image you may be using to create your effect). Hit Ctrl+A to select the tree, then click Ctrl+C to copy it and then close the image by clicking Ctrl+W. Now on your main image click Ctrl+V to paste the tree onto the image and hit Ctrl+T which will give you the Free Transform box. Now resize the tree, and rotate if needs be, so that the branches sit nicely over the antlers. I had to rotate the image to make it fit. Now hit Return on your keyboard to commit this, or click the green check mark that appears.
Step 2
Now add a Layer Mask by clicking on the Add Layer Mask button. Now select the Brush Toll by clicking B on the keyboard and select a hard-edged brush and set the Opacity of the brush to 100%. Now click D on your keyboard followed by X to get black as the foreground colour and white for the background. This will now enable you to mask off and hide the “antler” branches from the tree you do not want to show on the final image. To fine tune your masking you may need to make your brush smaller as you go; use the [ ] keys to toggle the brush size.
Step 3
Time to clone out the original antlers. First let’s move your tree antlers out the way. There are a couple of ways you can do this; I just went back to the Free Transform by clicking Ctrl+T and then grabbed the box and moved it just enough to be able to work on the original antlers. Ensure that you have the background layer selected by simply clicking on it in the layers palette. Select the Clone Stamp Tool and ensure that Sample all Layers is not ticked in the Tool Options bar. Adjust the size of the clone tool, again you can use the [ ] keys to do so quickly, and sample an area, by holding the Alt key down and clicking your mouse, to use to clone out the antlers. Now clone out the antlers.
Step 4
Once you are done cloning, click Ctrl+T again and move your tree antlers back over the elk. Add a new layer by clicking the New Layer icon, go to Filter>Render>Clouds. You will see the new layer fill with cloud like shapes. Set the Opacity of this Layer to something that appeals to you, play around a little to find the opacity that suits the photo and your taste. Now select the Eraser tool (not a tool I use often, so this was good practice for me) and using a soft-edged brush you can now erase some of these clouds if you feel like it. I actually did not do this step as my original image did not have any cloud or mist in it, so this gave it the feel I was after.
Step 5
Now it’s time to de-saturate the image and change its hue. To do this first you need to flatten the image by going to Layer and choosing Flatten Image. Now hit Ctrl+U to bring up the Hue/Saturation panel. Tick the Colorize box and set Saturation to around 10, Hue to around 185 in order to get a cool bluish look, I went for a more greyish look for my photo. Again, the values here will depend on your original photo and the kind of feel you want to give this. Click Ok once you are happy with this part of the process. I then added a Brightness/Contrast layer by clicking on the Create fill/adjustment layer and pick Brightness/Contrast. I chose just a little extra contrast and brightened the image as my original photo was a little dark.
You could stop here or carry on by adding a texture. Open your texture, pull it from the photo bin onto the photo, size it to match and then play around with the Opacity and Blending Modes.
As with all our Creative Effects Challenges, this is about having some fun and learning some new techniques and tools. So, let’s see what fantasy type images you can come up with.
This week I was inspired by a tutorial in the Digital Photo magazine, which hails from the UK and I am lucky enough to be able to purchase here in Canada.
I changed some of the steps to suit my original photograph. The tree photo png file came with the magazine, so I won't be uploading it here and the elk photo is my own.
So, here is my starter images:

And here is the final creation.

Step 1
Open your main image in PSE and then open your tree image (or other image you may be using to create your effect). Hit Ctrl+A to select the tree, then click Ctrl+C to copy it and then close the image by clicking Ctrl+W. Now on your main image click Ctrl+V to paste the tree onto the image and hit Ctrl+T which will give you the Free Transform box. Now resize the tree, and rotate if needs be, so that the branches sit nicely over the antlers. I had to rotate the image to make it fit. Now hit Return on your keyboard to commit this, or click the green check mark that appears.
Step 2
Now add a Layer Mask by clicking on the Add Layer Mask button. Now select the Brush Toll by clicking B on the keyboard and select a hard-edged brush and set the Opacity of the brush to 100%. Now click D on your keyboard followed by X to get black as the foreground colour and white for the background. This will now enable you to mask off and hide the “antler” branches from the tree you do not want to show on the final image. To fine tune your masking you may need to make your brush smaller as you go; use the [ ] keys to toggle the brush size.
Step 3
Time to clone out the original antlers. First let’s move your tree antlers out the way. There are a couple of ways you can do this; I just went back to the Free Transform by clicking Ctrl+T and then grabbed the box and moved it just enough to be able to work on the original antlers. Ensure that you have the background layer selected by simply clicking on it in the layers palette. Select the Clone Stamp Tool and ensure that Sample all Layers is not ticked in the Tool Options bar. Adjust the size of the clone tool, again you can use the [ ] keys to do so quickly, and sample an area, by holding the Alt key down and clicking your mouse, to use to clone out the antlers. Now clone out the antlers.
Step 4
Once you are done cloning, click Ctrl+T again and move your tree antlers back over the elk. Add a new layer by clicking the New Layer icon, go to Filter>Render>Clouds. You will see the new layer fill with cloud like shapes. Set the Opacity of this Layer to something that appeals to you, play around a little to find the opacity that suits the photo and your taste. Now select the Eraser tool (not a tool I use often, so this was good practice for me) and using a soft-edged brush you can now erase some of these clouds if you feel like it. I actually did not do this step as my original image did not have any cloud or mist in it, so this gave it the feel I was after.
Step 5
Now it’s time to de-saturate the image and change its hue. To do this first you need to flatten the image by going to Layer and choosing Flatten Image. Now hit Ctrl+U to bring up the Hue/Saturation panel. Tick the Colorize box and set Saturation to around 10, Hue to around 185 in order to get a cool bluish look, I went for a more greyish look for my photo. Again, the values here will depend on your original photo and the kind of feel you want to give this. Click Ok once you are happy with this part of the process. I then added a Brightness/Contrast layer by clicking on the Create fill/adjustment layer and pick Brightness/Contrast. I chose just a little extra contrast and brightened the image as my original photo was a little dark.
You could stop here or carry on by adding a texture. Open your texture, pull it from the photo bin onto the photo, size it to match and then play around with the Opacity and Blending Modes.
As with all our Creative Effects Challenges, this is about having some fun and learning some new techniques and tools. So, let’s see what fantasy type images you can come up with.


