|
|
Post by blackmutt on Jun 25, 2015 13:33:50 GMT
Terrific job blackmutt - did you use Topaz Simplify on this one by chance? Thank you and Storkington as well. I only have PSE 11 and used the Cutout filter and a combo of tools. I loosely followed a tutorial built for CS4 for making retro - travel posters but had to wing it pretty early on when it started using tools and fonts PSE 11 doesn't have. |
|
|
|
Post by cats4jan on Jun 25, 2015 16:18:32 GMT
Such creativity - everyone is approaching this from such differing viewpoints.
|
|
mrkrnbrd
Junior Forum Member
 Alive
Alive
Posts: 94  Open to constructive criticism of photos: Yes
|
Post by mrkrnbrd on Jun 25, 2015 17:02:43 GMT
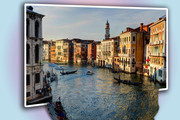
Just Out of Bounds effect, then simplified out of bounds layer and added ocean ripple effect and stretched (transformed) the oob layer  |
|
|
|
Post by hmca on Jun 25, 2015 18:27:55 GMT
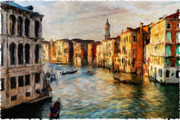
Hoping that water doesn't drip down on my watercolor! u.cubeupload.com/HMCA/625wcvenice.jpgI used this popular watercolor technique introduced in the book How to Wow with Photoshop Elements 5! 1. Duplicate layer and name smart blur. Choose filter > Blur > Smart Blur. Quality High/Mode Normal Experiment with sliders. Click OK 2. Duplicate the bkg. layer again (Ctrl + Alt. + J) Name the layer Smart Blur Edges. 3. Drag this new layer above the smart blur layer. Now choose filter > Blur > Smart Blur. This time choose Edge Only from the Mode menu. Increase the Threshold setting to see fewer lines. Click OK when satisfied. 4. Edges appear white on black. We want to invert the layer to get black edges on white. To do this press Ctrl+ I. Now change the blend mode to Darken to see the black outlines on your watercolor. 5. Add a canvas texture. First press Ctrl + Alt. + Shift + E to create a composite layer at the top of the layer panel. Name this layer Texture. 6. Go to Filter > Filter Gallery > Texture. Choose sandstone. Experiment with the settings to find a look that you like. |
|
|
|
Post by Sydney on Jun 25, 2015 22:36:22 GMT
That is so beautiful and well done Helen! And thanks so much for telling us how it was done and including a tut for it - awesome! I am going to have a go with it on one of my images that I was hoping to transform into a watercolour look, so the timing couldn't be better 
markrnbrd, you nailed that out of bounds effect - great imagination and fabulous job! |
|
|
|
Post by hmca on Jun 25, 2015 22:42:08 GMT
So glad you like it, Sydney. This was a very popular technique at EV. Were you a member there? Sorry, hard to keep track of everyone!
|
|
Bayla
Established Forum Member
 
Posts: 555
|
Post by Bayla on Jun 26, 2015 2:10:21 GMT
|
|
verber10
Junior Forum Member
 Best wide-angle lens? Two steps backward. Look for the 'ah-ha'. The Mitten State
Posts: 204 
|
Post by verber10 on Jun 26, 2015 12:38:17 GMT
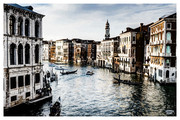
Wonderful job everyone. Thanks Tom for the starter image. I started out to make this a B&W. I followed a YouTube video from the Phlearn channel. But after doing it I thought it needed something else. So I imported the original picture and set it to OVERLAY blending mode. Then I dropped the opacity down to 50%.  |
|
Deleted
Deleted Member
Posts: 0
|
Post by Deleted on Jun 26, 2015 19:22:21 GMT
What a great effect Mike, looks like the photo was taken a loooong time ago!
|
|
|
|
Post by Tpgettys on Jun 26, 2015 21:17:38 GMT
Seems like every offering provokes the same response from me: WOW!
Nicely done; keep 'em coming!
|
|
shaun
Junior Forum Member

Posts: 85 
|
Post by shaun on Jun 26, 2015 22:01:38 GMT
The vintage look is to die for Sepiana; really really nice. I Looked up Filter Forge, and it says it is compatible only up to v12 of PSE; do you know if that is true? Thanks, Tom!
I have it installed as a plug-in in Elements 13; it works just fine.
EDIT: I forgot to say -- I have the Pro edition.
I have the pro edition as well but didn't see the plugin for elements 13. I tried to copy file from elements 12 into elements 13 plugin file, this failed which I assume is due to a 32 bit version of plugin. I next loaded filter forge from the start menu. Once the program had loaded I clicked on the tools option, located at the top left. From the tools drop down I selected 'updates' and there was one, so I clicked update. When I next launched elements 13, filter forge was available. I also found that that it was available in the CC version of photoshop as well. I don't know if this update is available for the standard version but it might be worth a look. |
|
verber10
Junior Forum Member
 Best wide-angle lens? Two steps backward. Look for the 'ah-ha'. The Mitten State
Posts: 204 
|
Post by verber10 on Jun 27, 2015 14:53:49 GMT
What a great effect Mike, looks like the photo was taken a loooong time ago! Thanks for commenting Simone. And thanks for all the Likes Helen, Madame, Tom & jackscrap ! |
|
|
|
Post by Tpgettys on Jun 28, 2015 1:43:58 GMT
I used Artista Impresso for this image  |
|
riandei
Junior Forum Member

Posts: 51 
|
Post by riandei on Jun 30, 2015 1:45:31 GMT
|
|
|
|
Post by cats4jan on Jun 30, 2015 2:09:32 GMT
And even more creativity. I'm really enjoying this work - but I'm worried about that flood.
|
|